Archive | November, 2013

Patagonia in Patagonia

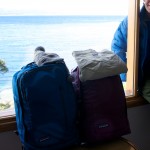
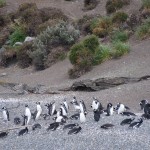
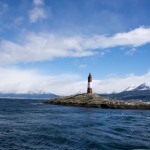
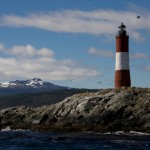
The chilling grip of Antarctica on Tierra del Fuego finally lessened enough so that we could pack up for Patagonia. Of course we used our Patagucci bags and winter gear. We didn’t exactly go camping but the extra warmth was definitely needed. The program for this day trip to Tierra del Fuego was to take a boat ride on the Beagle Channel. Maybe I watched too much Monty Python in high school, because I get really excited when there is a chance for an Albatross sighting. (Click here to watch it on YouTube).  No good photos of the one we spotted, so you will have to trust me that it was cool. We wondered whether one of the young Albatrosses we saw in New Zealand nine years ago might have been the bird that we saw. Jason’s video sums up the trip better than words can.

View of Beagle Channel

View of Beagle Channel

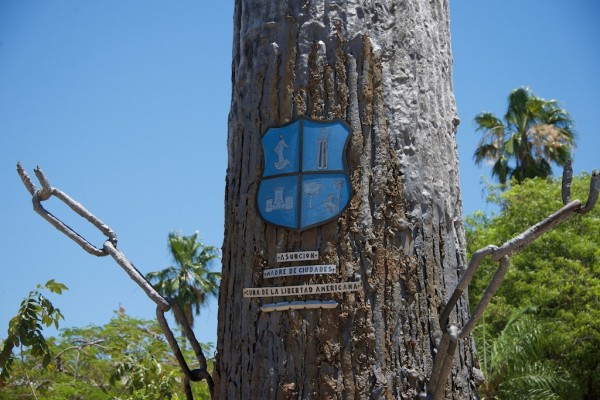
Asunción – where is that?

Having read the background info and found a flight, I announced to Jason that our next trip would be to Paraguay. I also told him that there were still strong Guaraní Indian influences. “Great”, he replied. “I haven’t had Chicken Tikka Masala for ages.” The Guaranís are one of the indigenous peoples of  Paraguay and while there aren’t many 100% Guaraní people left, the language is mandated alongside Spanish in school and 90% of the population can understand it.

Guarani/Spanish Partnership

Guarani/Spanish Partnership

Despite the lack of Vindaloo, we were happy to find that Paraguayans do like spicy food, something we miss in Argentina; I have read that Argentinians regard very spicy condiments as ruining the taste of good food.

The Spanish landed in Asunción in 1537 and formed an alliance with the Guaraní. Jesuits subsequently brought the Spanish language but were enthralled by the sound of Guaraní so a Jesuit priest created the first Guaraní dictionary, helping to sustain the spoken and written language. Even in the 1600’s and 1700’s, intermarriage was common (as opposed to other colonizations which wiped out cultures), helping to sustain Guaraní.

Mother of Cities

Mother of Cities

Asunción is known as “la madre de la ciudad” (the mother of cities) because it was the base from which many other centers were founded. Paraguay eventually declared independence in 1811 but shortly thereafter was under the influence of the supreme dictator for life, Dr. Francia, “El Supremo”. He closed the borders and no one was allowed in or out until 1840. The next dictator, Lopez, reopened the country but his son led the country into The War of the Triple Alliance, the country had a cholera epidemic, and he executed many of his countrymen. Eventually he was shot by one of his Generals. Fast forward to the Chaco War of 1932-35 with Bolivia; Paraguay won the war but lost many people. More dictators, and in 1954 Alfredo Stroessner (son of a German brewer) took over. Over his 35 year reign, the country harbored Nazis, killed its own people and was a center for smuggling. So it wasn’t until 1989 that the people of Paraguay could finally breathe a bit and the country could Asunción begin to free itself from history.

Since we only had one day, we did not get to see the countryside but we did get a flavor for downtown Asunción, which seems like a growing economy that is on the verge of becoming something bigger. The Paraguay river runs along the city and is a popular fishing spot. However, while we were there, the local police and Coast Guard seemed to be fishing for something in the river – smuggled goods? It must have been something since the local TV crew was there but we will never know as my Spanish has not yet progressed to the level of CSI: Asunción.

Terere

Terere

The popular drink in Paraguay is tereré which is mixed with herbs such as mint. On my first walk around the plaza, I was immediately drawn to the wonderful aroma of herbs being sold on the sidewalk. These guys showed me how they mix Terere. I also enjoyed looking at the colorful buses. The local joke is if you are walking somewhere instead of taking the bus, you say you are taking Linea 11 (11 looks like 2 legs).
We went to the municipal museum and the woman overseeing the exhibit tried to teach me a few Guaraní words. The language sounds very musical but I can’t remember anything she told me. It is a bit like Chinese, intonation really matters and if you don’t say something correctly you may embarrass yourself. Spanish is challenging enough for now.
Both museums that we visited appeared closed at first, but with a bit of persistence and a doorbell, someone was there to unlock the door and supervise the visit.

New Job?

New Job?

At the end of the day, we were happy we visited and learned a bit about the people, perhaps we should move there and take up trading?


How much water is left in the tanks?

On land, when you have guests over to your house, they often enjoy the nickel tour.   They examine the kitchen, admire the living room and glance at the office.   Imagine if they went straight for your electrical panel or your water pump.   Boat guests do just that and it takes some time to get used to the change in personal space.   Cruisers are running little cities.   We produce water, manage its supply, run generators, and have small solar arrays.

The finite resources on board are water, diesel, electricity and food.   Diesel is often considered king as it can create electric power via the generator, which among other things powers the water maker.  In the muddy waters of the Plata our water can only come from a hose on shore – and we consume it at a brisk pace.   We use it to wash dishes, wash bodies (we have a nice shower) and supply our fresh water head.   Most boats use salt water to run their heads but this can bring smelly sea life onboard.    Without being strict on our consumption, one  of our two water tanks lasts about 2 days.  With our current easy access to water, we have been a bit profligate.  Kind of like the economy with easy money?

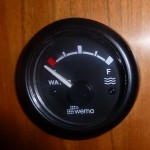
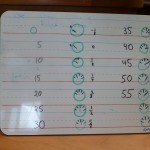
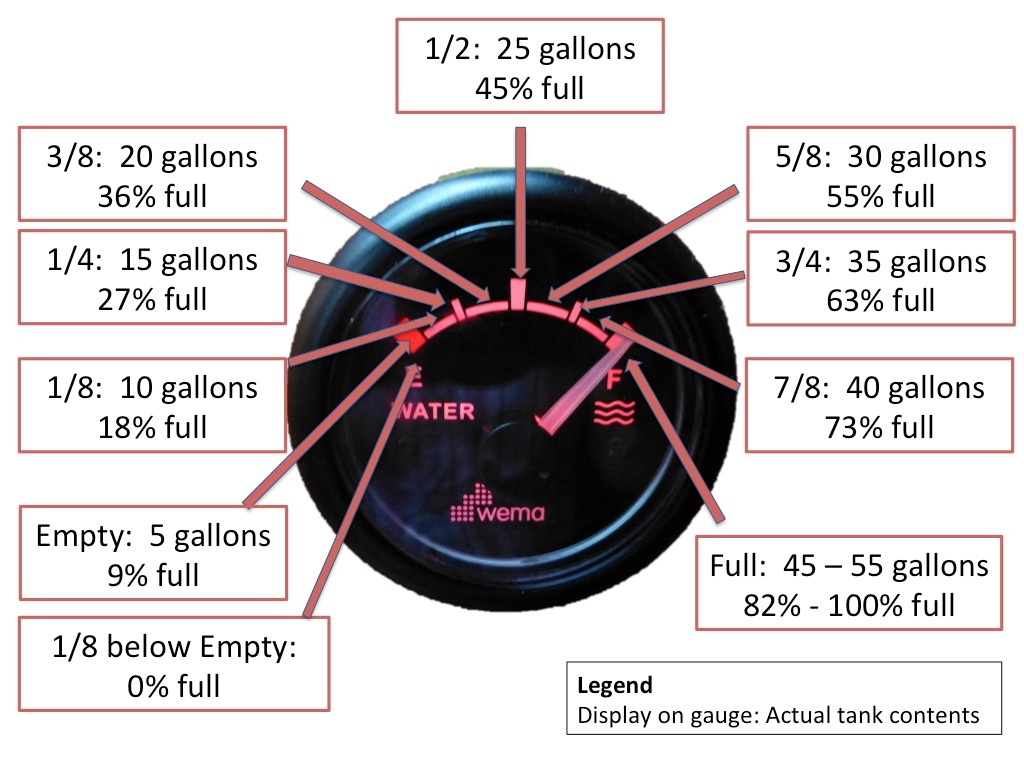
The water tanks follow the shape of the hull, so they are wider at the top than at the bottom.   I was curious to measure the accuracy of the water gauge.   So began an epic time-wasting mission.   With my starboard tank empty, I manually filled the tank using a 5 gallon jug.    I quickly discovered that the full gerry can weighs 45 pounds.   After each gerry was emptied, my reluctant assistant took a photo of the tank gauge.   45 minutes later and we discovered that the gauge is pretty good.   We were expecting the tanks to hold 60 gallons, but they held 55 gallons.    The position of the pick up ,can attribute to some of the missing gallons.  If you care, this drawing should help you obsessively manage your Antares water tanks.

Water gauge (Display vs Reality)

Water gauge (Display vs Reality)


Putting a Boat in Park

The killer app for boats would be an ability to shift into park like a car.   Instead, one employs many lines, anchors, mooring balls and more to hold the boat in place when in a harbor.   On our cruise, we tried a variety of methods for putting the boat in park after the sailing day ended.

First, life at a dock  is a cake walk.   You attach the bow/stern lines to dock cleats, add a few spring lines for good measure and adjust your fenders.   Expect to lose sleep only when your neighbors’ late salsa music wakes you.

Mooring Ball

Mooring Ball

The next level up is a mooring ball.   This is an easy move in the BVIs where the balls are serviced regularly and have a friendly pennant line to make attaching to the ball a breeze.   In Uruguay, the balls lack the pennant line and are also impossibly heavy to lift, so we used a modified strategy.   Rather than grab the mooring ball from the bow,  I maneuvered the boat so that the mooring ball was near the stern steps and Gail gracefully attached a long line which could then be walked to the bow.  We hopped in the dinghy to attach to a second line to make a bridle.    This was also stress free – until 2 am when the tide ran out of energy to flood and switched to ebb.  This was when we realized that the mooring balls were not spaced properly for a 44 foot boat.   This news did not arrive via a friendly email but by a gentle thumping noise.   As I am a new boat owner, I leapt out of my skin and raced on deck to check on what was left of my stern.   Not even a scratch.   Gail used the boat hook to joust with the mooring ball  from the boat from 2 to 3am until she was releaved of duty by a change in the wind.   The sailboat companies do not list those early wake ups in the advertisements.

Anchoring is a topic about which volumes have been written.   Ask four sailors how to anchor and you will get 5 opinions.    Dropping and raising anchor has become much more civilized since the time of Nelson.   As long as your thumb is in decent shape, you should be able to press the up button on the windlass and from the depths will come pounds of chain, an anchor and sometimes unwanted mud.   No octopuses or treasure chests have come aboard Two Fish, yet.  The anchor can be raised from the bow or from the helm.


Mediterranean Moor

Mediterranean Moor

Where the fun really started for Two Fish was the Mediterranean moor.   A Med moor is like tight mens’ swimsuits – a European convention that the US has not embraced.   The boat crew drops the anchor and then reverses towards the sea wall, where stern lines are attached.   The result is that you can hop from your stern to the shore and buy a fresh baguette.   The sailing brochures fail to mention that this type of mooring can raise your heart rate when there is a crosswind and the marina staff are watching you as if it is the Sud America Football Cup.  Med mooring with a cross wind is like parallel parking a car except the spot is moving slowly away from you.  What is moving seemingly quickly towards you is another boat or, in my case, a metal barge.  Like most things in life, there is a trick to make Med moors easy.   Just drop the anchor upwind of your desired position on the seawall and the cross wind will put you in the correct spot.     The process for leaving a Med moor is to quickly lift anchor before contacting your neighbors.   Again a trick can help.   BUY VERY LONG DOCK LINES.   250 feet is a great line since you can go forward and raise your anchor while your stern is still attached.   Ah, Mr Crosswind I have defeated you again.

The next day, the mooring gods came up with a new trick.   The marina staff came by moments before our departure and dropped their maintenance vessel’s anchor and chain on top of our long and heavy anchor chain.   We waited patiently so as to be good guests.   The staff then realized their mistake and tried to rectify the error.   This is when Keystone Cops began.   The marina staff dinghy had a 6 hp engine.  Not enough power to pull two kegs but the determined dock worker had a plan to execute, even if the laws of physics were against him.  Newton be damned.   His plan was to use sheer arm strength to lift our strongly-set 75 pound anchor from the muddy harbor bottom.  Finally, he realized the futility of his mission and decided to duck their 3 pound anchor under our chain.   We were free to go.

Putting the boat in park is always an adventure.  Just think of this the next time you park your car at the mall.

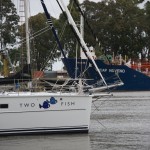
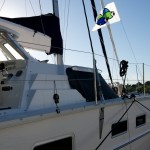
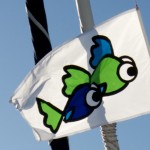
Two Fish “Battle” Flag

Two Fish has no intention of going to battle, but we now have a battle flag.   My Mom went over the top and “volunteered” to sew a Two Fish flag.  It was a Herculean effort that tested her eyesight and took many months to complete.   The secret to flag production is that you sew the next color on top of the existing layers, starting with the 4×6 foot white cloth and ending with the fins. Lots of work!   We are so thankful and will enjoy having my Mom’s work looking over Two Fish.

We raised the flag last week to start our boat party, beginning our new tradition.


Cruising Uruguay

In a sailing log book, one records a destination as something you are sailing towards, not sailing to.   Sailors try to get somewhere, but they do not have to absolutely, positively be there.  Plans can be scuppered by winds, waves and a lack of rum.   We were sailing towards the end of Uruguay – Punta del Este,  but only managed to sail half the distance.   The adventures of the three person crew (Jason, Gail and our friend Michael who is also a sailing instructor) begin here.
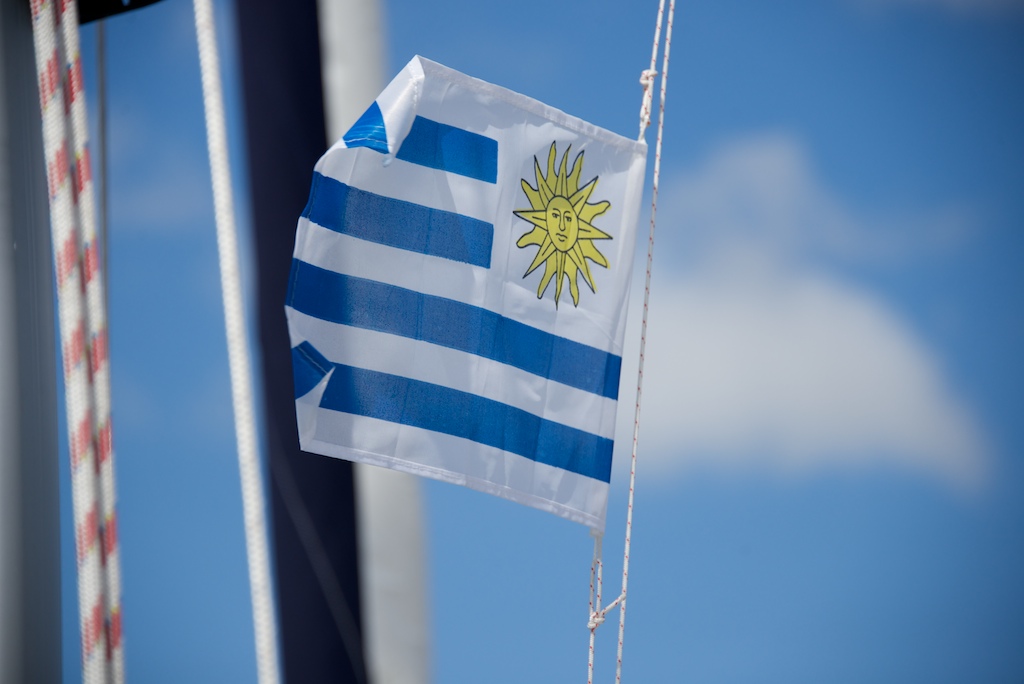
Uruguayan Flag

Uruguayan Flag

Sailing voyage posts can be as exciting as the shipping news.  “Wind was North North East at 17 knots with gusts up to 24 knots. …”     The wind and the waves affect the comfort and performance of the boat and its crew in every possible way.   Cooking in large waves can resemble a knife tossing act from the second ring of the circus.   Bouncy nights at anchorages can leave the crew cantankerous in the morning.  So please excuse sailors for looking like they are on a casting call for the Weather Chanel.
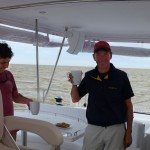
Memo and Domican

Memo and Domican w/ tea

We left San Fernando, Argentina for Colonia, Uruguay.   The night before, Memo, our boat builder, helped me create a route on the chartplotter.   As it is an active delta estuary, the Rio Plata is not a straightforward place to sail.   The 3,000 miles of rivers empty tons of mud into the Plata each year, creating shallow spots miles from land.   Our boat draws a very thin 1.2 meters yet we had to be diligent to avoid running aground.   A straight shot to Colonia would have put Two Fish on the muc.   We opted instead to head south towards Buenos Aires, followed by a Memo-prescribed 90 degrees turn towards Colonia.   All of this was done under the iron genoa (old sailing nickname for the engine).   If we had not had our heads buried in the excitement of the day and our new electronic toys, we might have sensed this as an omen for our 2 week cruise.

The Plata has may wrecks which are littered across the chartplotter display.   The Maria Lisa, the Juan Jose and many others were created when the flat waters turned nasty.  One of the exports from Uruguay to Argentina is rocks.  You will not be surprised to find out that the rock business is not high-margin.   If you work at Google, do not take that job at the Uruguayan Rocks Corporation.  To be competitive in the rock business you have to buy a cheap barge and overload it to the point that the gunnels are 3 centimeters above the water.  On a calm crossing of the Plata, the barge full of rocks arrives in Argentina without an issue.  However, an unexpected breeze will allow the rocks to follow their natural instinct and sink below the waves.  Fortunately, this typically does not result in a loss of life, since it often occurs in 2 meters of water and the newly formed rock pile is a great place to wait for rescue.

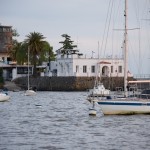
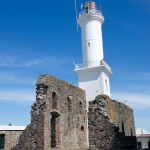
Colonia

Colonia was traded back and forth between the Portuguese and the Spanish more times than an on the run 5 year treasury.   Here is the history in a few run on sentences.  It was founded in 1680 by the Portuguese, conquered by the Spanish the same year, then returned to the Portugese in 1681.   In 1705, it was snatched again by the Spanish but returned as part of the treaty of Utrecht.    The Spanish failed to take it in 1735.  A blur of changes in 1750 and 1777.  In 1816, it becomes part of Brazil.   Then part of the country Banda Oriental.   A few more changes and now Colonia del Sacremento of Uruguay.

I got the feeling the people in the town were not confused as to whether they were Spanish or Portugese.   Instead they are focused on being great stewards to a world heritage site.   The original downtown is Portuguese colonial style which is an ideal backdrop during an after sail stroll. Be sure to stop by the Tourist center near the Buquebus terminal to pick up a walking tour map and learn some more history.

 Keeping up with the Jones
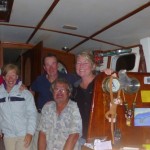
Crew of Momo
Crew of Momo

s/v Momo

s/v Momo

We have joined a new, very social group – cruising sailors.  Our induction started out in grand fashion when we met the crew of Momo.    Momo is crewed by a German captain who has been living aboard his boat for 18 years.   His first mate, an American named Jenny, split her youth between the two noncontiguous states: Alaska and Hawaii.  That is the real estate equivalent of sweet and sour pork.   She also once worked as a trucker.   They were very kind and invited us over for homemade delicious beef and spaetzle.   People do such nice things for you when cruising.   We are not in New York City anymore.

The highlight of the evening was Gerald’s stories of his sea dog and other sailing adventures.   Years ago while he was in the French Caribbean he would walk his dog on the beach every night past a group of French-speaking 12 years olds.   Gerarld spoke to his dog in his native German.   On the last evening, he overheard the French 12 year old tell his parents “Mom,  that dog is the smartest.  He also speaks German!”.

During the New Zealand America’s cup, Gerald stayed at the Royal New Zealand Yacht Squadron.   As the formal name implies they held the America’s Cup.    Gerald had been at sea for a decade and had not kept up with the current Cup defender.   As he came to the yacht club bar, he asked some old salts “Why do you guys have a copy of the America’s cup.   The Australians have the real one, right?”.    A few jaws hit the floor.


Two Fish Sails in a Breeze
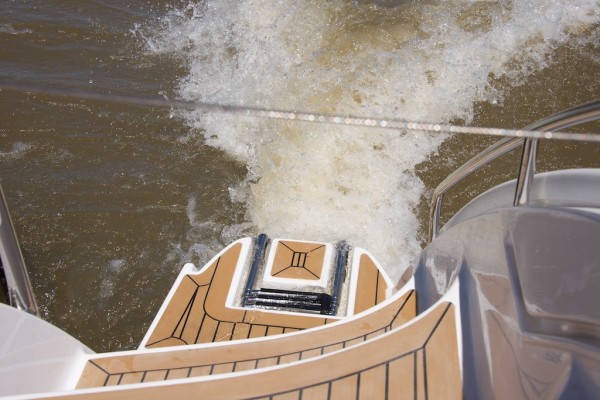
Wake made in the Plata

Wake made in the Plata

Twice during the 14-day cruise, we experienced 30 knot sustained breezes.  No pictures of this since I was busy sailing and wind never shows up in my photos anyway.  The big breeze was a great workout for the rig and a nice test of the crew.   The boat was easy to sail both into the wind and off the wind.   She tracks nicely and responds well to a stable hand at the helm.  Into the wind, we had two reefs in the main and genoa; this left us with a balanced helm of only 5 degrees of weather helm.  In strong winds, the boat can be enjoyable to sail for new sailors veterans alike.   I kept turning off the autopilot to better understand the boat’s tendencies.    Gail discovered that in the big breeze, she has a favorite position to sit when off watch – her  Spiderman cubic bean bag, that has cost her USD 2.  The Argentines wisely call this a “poof”.

Up a river with a boat (Riachuelo)  and Any Puerto in a Storm (Puerto Sauce)

On the fourth night, we chose to anchor up a river that local sailors had recommended.   It seemed like a scene from Heart of Darkness.   There was much tension on board as we were relying on a Spanish language cruising guide to keep us off hidden rocks and shallows as we sailed up the river.  Sailing may not require a sextant anymore, but it does require an iPhone with an English to Spanish dictionary.   Columbus had it so easy compared to us!

After all the hard work, we were rewarded with a wonderful night anchored in the river.   By morning the breeze had increased, testing our simple anchor plus stern tie to the shore system.   We had to leave before more branches from the shore side tree came aboard.  Anchoring in this river really summed up cruising for me.   You find a perfect place that brings you great peace and comfort.  But 12 hours later our paradise was becoming windswept and we were forced to move on.    We left quickly, as we did not have a stern anchor and were defenseless in the  building wind.

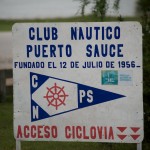
Going to weather in 30 knots becomes annoying for everyone, it is just a matter of how quickly.  Gail has adopted the old sailing slogan “Gentlemen do not go to weather (sailing in the direction of the wind)!”   After a bit of bouncy sailing, Gail hinted that she had her share of going to weather.  We scoured the cruising guide for any port in a storm and found that the nearest was Puerto Sauce.  We we so happy to be in a more protected location, that we did notice immediately that the 24 hour-a-day cellulose plant showered the boat in fumes and noise.

We had a small adventure trying to buy a garden hose for filling our water tanks.   The hurdles to buying a hose were twofold: I did not know the name for garden hose in Spanish and the modest inventory of  retail establishments in Puerto Sauce.  I now know the name for garden hose is manguera.  After 2 days of visits to severals stores in Puerto Sauce, the closest we got was a storekeeper that said it might be possible  that a hose might show up in a few days time.   The hose adventure continued into another town and culminated in a fevered over buying of hose when we finally found a seller. Fortunately, an Italian boat lent us their hose in the interim.


The Po Po (Police or Prefectura) chase down Two Fish

After a week or so in Uruguay we had become regulars of the check in / check out procedures.   We would get on the VHF radio to announce our departure.  “Control, Control esta barque two fish salida para cinco horas”.   This proclamation that we were leaving for 5 hours was greeted with silence.   During one of our departures, Gail and Michael (without asking me) decided that they would forgo the radio check out.  They were emboldened by comments from more seasoned cruisers.   The breeze was blowing over 15 knots and we were marching nicely to windward.   Not as nicely as the mono hull that was out pointing, but nice enough from my purposes.  Gail put up the alert first.  “Jason, that Zodiac is on a collision course with Two Fish!”   I momentarily dismissed the warning until I noticed that the Zodiac was flashing a blue light and chasing us down.   Tensions rose as they were shepherding us to shore on a path that was too close to hazards for my taste.   I was about to turn away when I realized what their concern was.  They thought we had done the yachting equivalent of the dine and ditch.   I yelled over the breeze in my poor Spanish that we were only out for a day sail.   Gail resumed check out procedures the next day, and from then on Control responded with “OK Two Fish”.
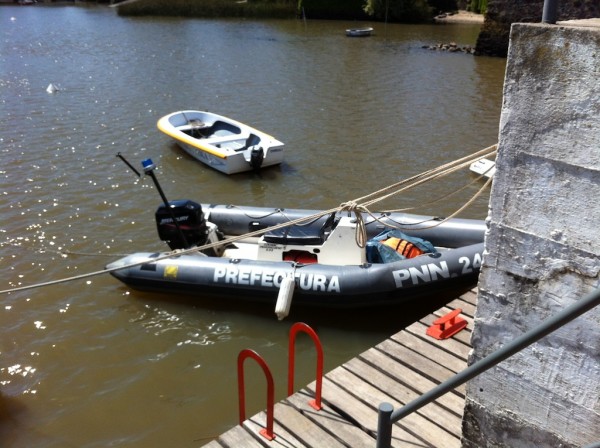
Prefectura

Prefectura Chase boat is faster than Two Fish (Notice the Blue light)


Final Cruise Thoughts

We had a lot on our minds while testing and learning the boat, so I am not sure a review of Uruguayan cruising grounds is fair.   What I did like was the people, the facilities and the food onshore.   The paperwork and somewhat up and down breeze were not perfect.   But any of the shortfalls were made up by the enjoyable crew aboard.


Tips for Uruguay Paper work  (skip if you are not sailing to Uruguay)

1)  You need to fill out 3 copies of the official crew list.

2)  Your first port of call will take one copy forever and return 2 copies when you check out of the port.

3)  On arrival in your first town you need to visit a) Prefectura, b) Immigration (bring 67 pesos in exact change, about 3 USD),  c) Marina billing office, d) Prefecture again.  In Colonia, Immigration is  a 15 minute walk from the pleasure yachts.

4)  On departure, visit only the prefectura to get your 2 crew lists back

5)  For each new town, repeat 3 and 4 but skip Immigration.

6)  On departure from your final Uruguayan town repeat 3 but now surrender your second crew list leaving you with one for your next country.

Budget a few hours for this process.  All friendly and helpful, but a bit slow.


A Review of the Sails During Our Uruguay Cruise

After an enjoyable and busy shakedown cruise in Uruguay, I have some thoughts on the sailing part of the sailboat.  This post will be full of  uneducated preaching on sail handling, so I am eager to hear corrections and comments from sailing veterans.  My target audience for this post is small.   If you are not a sailor, then this post will seem pompous and needlessly technical.   If you are an accomplished sailor, then you will be able to correct this post in my attempt to  teach others.   So, I am looking for that one person who is massively interested in sailing but knows less than me.

The Antares has fewer lines than a comparably-sized race boat.   No topping lift for the spinnaker pole, no jib cunningham,  no twing lines and only 4 halyards.   The boat moves we need to execute are simple, but we need to be able to do them with one or two crew and in 40 knots.   A dumb move on a Laser in high winds results in a swim but on a large cruising yacht you may lose a finger or two.  Cruising is all about slow and steady.  Do it right every time.  To strengthen our skills, we invited Michael Domican of the BVI to tutor us for two weeks.   His sailing resume is impressive: for the past 12 years he has taught catamaran sailing and prior to that he trimmed the mainsail on the 12 meter UK challenger for the America’s cup.  He is an amazing teacher and we can not thank him enough.  If you are looking for help on how to sail the boat safer, faster and more comfortably, give him a call.   This post is my memory of his lessons.    Any of the smart stuff is credited to Michael and any stupid stuff is credited to my poor memory.

So, imagine you have just motored out from your anchorage location and are ready to enjoy the breeze on a nice, sunny day….

The first sail to go up is the Main Sail and typically with the motors running so as to help keep control of the boat.

Process for raising the Main Sail

    1. The sail needs to be free so “Release the Corners”  (Vang off, Reef #1 and #2 off  (if raising to full Main), and add a bit of slack to the reef lines at the mast for good measure)
    2. Sail Ties off. (sounds simple but easy to forget)
    3. Topping lift.   Before sailing I like to leave it attached to the stanchion out of the way unless the conditions are vang abusive (choppy and light air).  It just is another hazard for raising the main and I hope to get my ideal twist with vang, sheet and traveler.   I put it back on when not sailing to avoid stressing the vang.
    4. If you frapped the halyard while anchored, quickly remove the slack from the main halyard.
    5. Traveler should be on centerline UNLESS this is being done while hove to.   If hove to, move the traveler to align with mainsail. Up to this point, you can take your time as not much is going on to unsettle the boat. After this, don’t be maniacal but don’t daydream either.
    6. Release the mainsheet –  In light air, you may need to manually pull on it a bit near the mast.
    7. Tips on holding a boat head to wind. This is crucial when raising the sails.   Use the boom to determine if you are head to wind.  Skip this if you are hove to. Holding a catamaran head to wind is all about your engine control skills.  It is easier to stay head to wind while maintaining some forward momentum, but often to avoid the prospect of raising the sail in lumpy seas, you are in a protected harbor with limited sea room.  If you go blasting forward at 2 knots you will crash into the pier.  Try these tricks to be a pro:
      • Lock out the wheel with the rudders straight.   Do not use it at all. Stop it – I just saw your hand creep back to the wheel.   Use your engines to steer.
      • Make sure to have a good view of the boom, windex, other boats and the water.   All are great ways to see where the breeze is coming from, assuming there is no current.   Try not to use the electronics.
      • To adjust the boat head to wind use forward on one engine and reverse on the other.    Now look at the background behind the forestay and see how quickly your are turning.   Too much power and you will turn quickly and need to over-correct   Too little and you are not turning at all.   Next, line up a reference point on shore with a nearby stanchion.   Are you moving forward or backward?   If moving forward then your next throttle adjustment might be only a reverse on the appropriate engine. If you can’t find a good lateral reference point on shore, watch the bubbles on the water surface.
      • Practice “holding station” a bunch as this is great skill for raising sails, docking, and being boarded by the Prefectura (the spanish Po Po).
Full Main

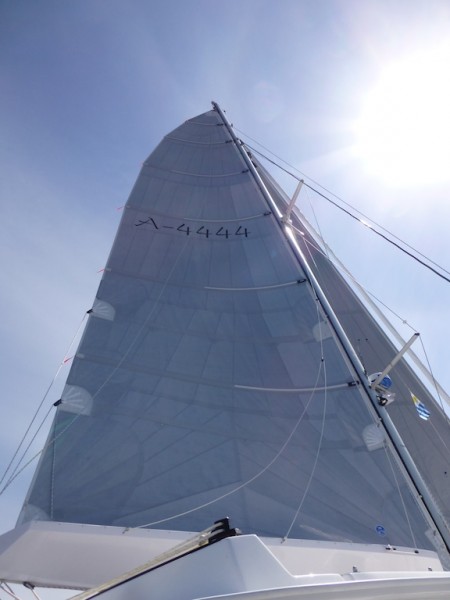
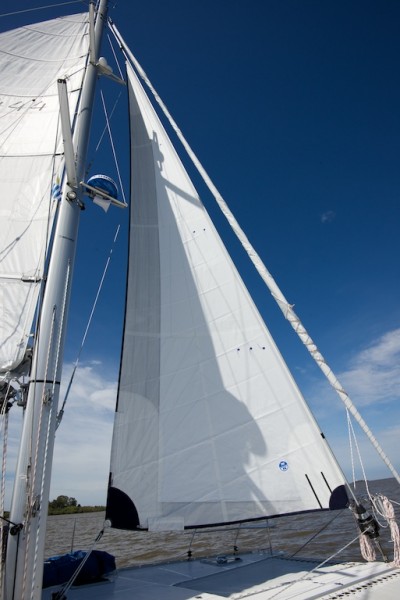
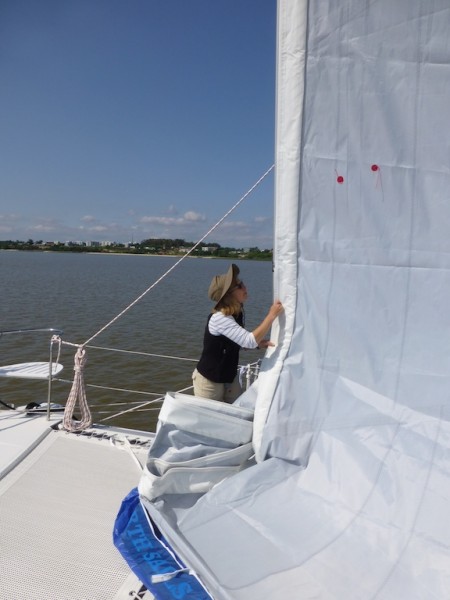
Full Main – Two Fish Logo coming soon – Notice reef Blocks sewn in leech

  1. Holding the boat head-to-wind, raise the Mainsail.   I like to use “power Jason” at first, instead of the power winch. I do this to ensure nothing is jammed – the power winch has no subtlety, the two gears are up and rip.  Then I use high gear for the first 90% and low gear for the last 10%.   Keep your eyes on the sail.   First, make sure you are actually raising the main, not using the spin halyard in a mistaken effort to remove a stanchion – a costly move for you, but fun for others to watch.   Then make sure the Main clears the lazy jacks.    Now watch that reef two is coming out cleanly. Did you last sail the boat double reefed and forget to release the clutch?   The reef lines sometimes like to hook around the end of the Park Avenue boom.   The next hazard to watch for is reef one.   A few feet later, I switch to low gear on the power winch.   The helm person can see the luff better and can help get the right luff tension for the current wind speed.   Too taut and the luff has an odd fold.   Way too taut and the ripping noise will be a clue that you made a mistake. Note from Gail – I am too short to see what is going on with the sail while standing by the winch. I like to stand on the aft bench, holding on to the stainless, and use my foot to control the power winch.
  2. Your Main will now look like a sail from a polynesian vessel.   The vang ram will be forcing the boom 2 feet higher than its proper position.   Trim the mainsheet, which will initially act like a Vang and you can now bear away to your proper course.    Now remove the slack from the vang line.  The Vang over-raises the boom because of the design of its peak power point.  When compressed it can handle more loads but when not under load, this creates a bit of the Kon Tiki effect.
  3. One more check that the reef lines are not causing troubles and  remove any slack in them with a light hand.
  4. You can now shut off your leeward engine and get ready for a head sail.   With only the full main up, the boat has a decent amount of weather helm so it is important to keep your windward engine running until a head sail is rolled out.

Head Sail Unfurl / Furl

  1. Rig the Genoa or Code Zero (sometimes called a Screecher) sheets and choose the Jib Car position.    Typically, the Genoa sheets go inside the shrouds and the Code Zero sheets go outside the shrouds.   Wrap both sheets with two wraps around their appropriate winch and remove slack.
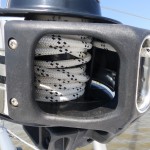
  2. To unfurl a head sail, it is easy to just pull on/grind the sheet. But you will create a future problem at the furling drum.  While furling sails are an established technology, you still need to keep your drum under control:  always have friction or light resistance on the furling line when unfurling.  When the sail is going out, line is going in the drum and can you can create overrides and/or have bunched up line if there is no resistance.

    You are trying to create a tidy-looking drum.  Might be worth checking on your drum once and a while.  If it gets bunched or wrapped you could be unable to furl.   That would suck since it most likely jam half way furled and in a big breeze.   Your only option is cut the sail as dropping the halyard would do nothing.

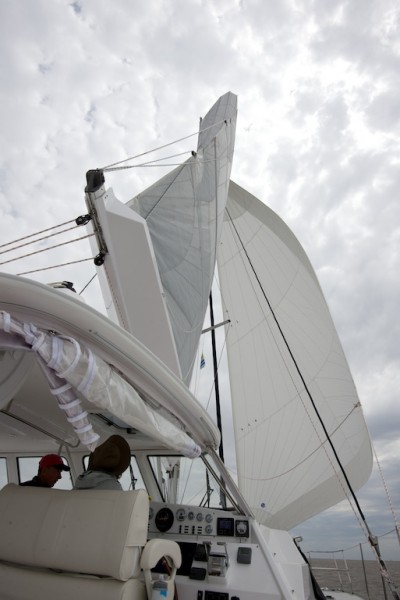
  3. Code Zero

    Code Zero

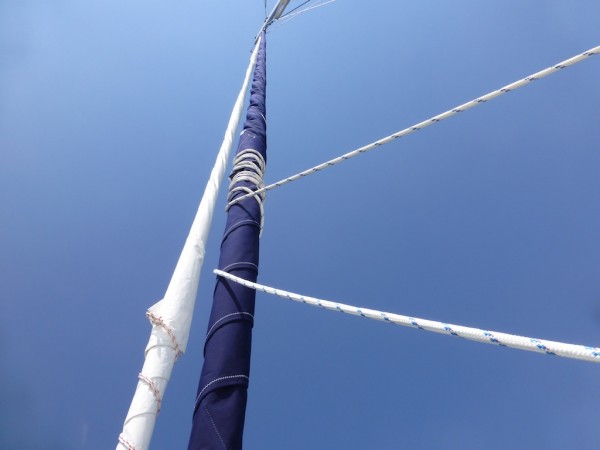
    The Code Zero does not have a drum to store the furling line; the headstay is turned via a code zero furler – a simple mechanism that looks like a pulley at the foot of the sail. Before furling or unfurling, check the lines and the code zero furler to make sure the lines are taut and the line is well seated in the furler. Don’t just look forward, walk all the way to the furler. (We learned this the hard way). In the cockpit, there are two lines at all times.  One short and one long.  There is no labeling, but it is easy to remember, in all cases pull hard on the short one and lightly ease the long one.   For example,  to unfurl, pull the short end and keep light friction on the long one while someone is using the working code zero sheet to unfurl the sail.  After unfurling, your formerly short line is now long and the long line is short.   To furl, pull the short one and keep friction on the long one.  Easing needs to be controlled to keep the lines neat but the sail not fully loaded.   Even with sailing deep downwind, furling the code zero can require some strong pulling.   The factory supplies you with a pennant line that allows one to lead the Code Zero furling line to the aft power winch.   I would use this as a last resort.   The Code Zero is furled with the shiny side hidden because the other side has UV protection.  If you don’t keep tension on all lines, it is easy for the line to exit the furler.    If this happens you can drop the code zero on the deck by releasing the halyard.  This is not a bail-out option for the Genoa/Jib.   Then, fold in the pole and rethread the furling line.   Cowboys may wish to climb out on the pole to fix it quickly, but this is not recommended by the chief safety officer.

  4. Be kind when you rewind, do it off the wind!   If you are steering 140 degrees apparent wind then the loads on the system are very small.  You will get a nice furl and will have a sail set up for action the next time you need it.    One person uses the helm side power winch to bring in the furling line for the Genoa/Jib.  The other person creates symmetric friction on the two sheets.    I like both sheets with 1 wrap on their respective winches while I am holding the two sheets while standing by the toe rail.   I then have a great view of the sail and can ensure that it is wrapping up neatly.    At the end I allow the clew/sheets to wrap 3 times to keep the genoa nice and closed in case of a storm.   If you are sloppy during this step you have a chance that a storm wind might pry open your genoa.   Not a good thing.   Then flake the sheets and tie them to the seagull striker.
  5. Furled Headsails

    Furled Headsails – Code zero (sloppy) Genoa (clean)

    How tight should you furl?   A really tight furls sounds great but it is hard on the genoa or code zero to be compressed.   The furl should be not too tight but neat so that there are no gaps for a storm to attack.   If you furl extremely tight  then you most likely you are furling the sail under load.   The winch is strong but this is a bad habit that will catch up with you.

  6. Another check is that the furling line should have 4 wraps on it when the sail is furled.   Those extra wraps are there for when you do furl under load.   Stuff does happen where you do not have sea room and need the sail away ASAP.   If you have more than 4 wraps your drum might get crowded when unfurling the jib.
  7. Shut off engines and put the morses in correct position. What is that? It depends on your propellers-folding or feathering. Volvo props and Gori props are folding props-these fold backwards while under sail and centrifugal force opens them when under power. If you have folding props, leave the morses in Neutral or Reverse (according to the Volvo manual). Remember to take them out of gear first. Max-Props are feathering. These have a mechanism to rotate the edge into the water flow while under sail. When under power they rotate into different positions for forward and reverse. If you have Max-Props, once the engines are both in neutral and powered off move the morses to max reverse to stop the blades from spinning. Wait a minute and listen for a change in sound.   Your props are now feathered.  Then move the morses to max forward to avoid the genoa sheets from getting fouled in them during a tack.
  8. One last note: to Reef the Genoa, just furl it in to the desired point rather than furling it in all the way. Your sails might have guides taped on them to help you determine a good first reef and second reef point for these. After a while, you will get a feel for the size of the sail that you are looking for.  The Furlex manual also has some tips on reefing. They propose you unfurl the full sail and then furl back to the reef point to create a tighter luff for sailing.   This tight furl would not be good for storage but gives the sail a finer entry which is useful when sailing to weather.


Reefing the Main

Single Reef in the Main

Single Reef in the Main

  1. There are two ways to skin this cat.   One is to be head to wind and the second is to heave to.   As the latter is more likely let us discuss this process (who wants to be head to wind in 30 knots with the genoa/jib banging when you can heave to instead?).
  2. Heave to by either tacking into it or grinding into it.
    • Tacking into heaving to is to tack but let the Genoa/Jib back-wind by not releasing the jib sheet.   After the tack, while the main is eased, turn the helm to be in opposition of the jib’s force (For example, if you are on starboard tack, you tack to port. The main is on port tack but the  jib is has remained trimmed on starboard, trying to pull the boat more to starboard. Turn the wheel fully to port and lock the wheel. Note from Gail – a simple unsanctioned way to think of it is if you turned the wheel to starboard to tack into heave to, when the jib is backwinded turn the wheel fully in the opposite direction, to port).
    • The grinding into process does not require a tack;  the lazy sheet is ground and the working sheet is eased, such that the sail is now backwinded to windward.   The tacking-into hove-to technique on the Antares is kinder on the Genoa as the radar and diamond strut get in the way of grinding into it.  Either way, this maneuver should be done with a reefed Genoa to allow a better balance of your center of effort and less Genoa interaction with the radar. You still need to turn the wheel in opposition to the Genoa/Jib pull.
  3. Now the boat should be calmer and stable while drifting slowly under hove to.    Ease the main halyard looking for your mark on the halyard that indicates your first reef while also watching the sail.  Ease one foot past the mark and cleat off the main halyard.
  4. Slowly sheet in the first reef line.   Ensure that the reef line is not caught on the aft portion of the main tamer. Then watch as the tack will be pulled down first.   After this is completed the clew will start to be pulled down.   Keep stopping to make sure you have this in clear view to avoid damaging the sail.   When both reef points are snug, engage the reef #1 stopper.
  5. Add main halyard tension to ensure a flatter sail shape than when under full main.   Also, when trimming this sail in high winds you may want to induce more twist to spill wind.
  6. To exit hove to, unlock helm and begin steering while the jib is trimmed properly.   To release the jib and avoid a violent thrashing of the sheet, employ an incremental process.   First, ease 3 feet on the backwinded sheet.   Trim in all the slack on the old lazy sheet (soon to be the working sheet).   Then go back to the backwinded sheet and ease 3 more feet.   Trim in again on the new working sheet.   Yup, just keep doing this until the jib is back in its correct spot.

The Jib

Jib (smallest headsail)

Jib (smallest headsail)

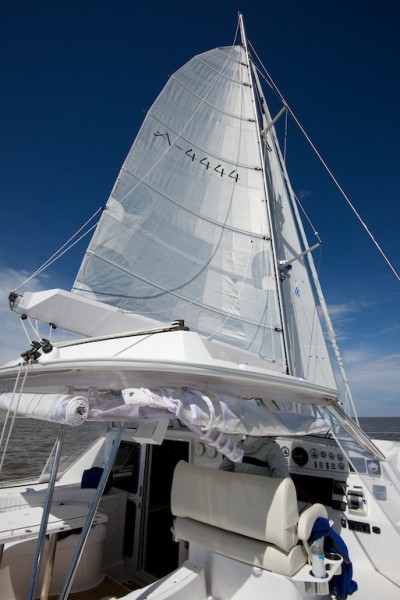
I love this underused sail in the Antares arsenal.   As you can see it is about one-third the size of the full Genoa.   Many owners have told me about sailing in 40 knots with just a scrap of the Genoa unfurled; it is great to know that the Genoa can handle such strong wind.   But my preference would be to have the Jib up in those conditions because: it is made from a sturdier cloth that loves the big breeze, the luff is much thinner than the furled genoa, and, the cut of the sail is flatter.

The only problem is that you must have the forethought to change from the Genoa to the Jib before the breeze gets too strong.    We did a few sail changes in easy conditions, but with a strong breeze and green seas I can imagine this might be a bit more action-packed.   The Jib is also auto-tacking which is great for short-handed crew.    Since the mainsheet and jib sheets are controlled very close to the helm, one person can have plenty of control of the boat.   The cost of the auto-tacking configuration is the process for heaving to.   You either have to go forward and move a stopper that will prevent the jib sheet from auto-tacking or lead a temporary line from the jib blocks aft that will restrain the jib from auto tacking.   A bit more forethought.   I am not a legend in the forethought arena.   Gail will need to help on this one.

The jib sheet is attached to the clew via a harken shackle.   This shackle does not have a captive pin so be careful when attaching or detaching the jib sheet for this smaller sail. (and carry some spares).

Raising Genoa

Raising Genoa


Dropping and Raising Headsails

  1. Dropping – Try to be off the wind so as to use the main sail to block the breeze and make the job easier.
  2. While the sail is not loaded, ease 2 feet of Genoa halyard.  Use the genoa sheet during this process to keep sail close to the boat and to not drop it into the water (keep it inboard of lifelines).
  3. Crew detaches the bottom shackle and and gets the sail out of the headstay groove.   Crew signals for more halyard drop.   Drop as quickly as the crew can consolidate the sail onto the trampoline.    When the head swivel arrives, tie it to the dolphin striker using a sail tie-down.
  4. Detach shackle from head of sail and attach to swivel.
  5. Flake sail and place into sail bag.   If you are dropping the Genoa, then tie the long sail bag to stanchions, to avoid loss of bag.
  6. Raise a new sail by repeating the above process in reverse order.   Make sure the sheet is already cleated in on the appropriate side at loose trim.


You may want to take a break and get a drink now but I am almost done writing.

Tacking

It is more fun to hand steer the boat during a tack or gybe but when short-handed it might be better to let the autopilot take charge, if you have an autotack feature.   Press the turn button and 4 choices should appear (two tacks and two gybes).   The tacks (port to starboard and starboard to port) are programmed to go fast since catamarans like to get caught in irons.   I programmed a wide tacking angle of 110 degrees.   This will not win races, but will make it easier to keep the boat moving.  Furuno autopilots are polite and wait 10 seconds to start the tack after the button is pressed.

Solo tack plan for a Genoa

  1. Ensure sheets are prepared for a tack.   Remove figure 8 coiling of sheet off the active winch.   Flip the pile so the bitter end is on the bottom to ensure a cleaner release.    Ensure that the lazy sheet has two wraps and that the winch handle is near by.
  2. Make sure that where you are tacking to is clear.    Check for other boats and chart for any issues. Even if using the auto feature at the helm, think about where you will be pointing at the end.
  3. Instruct Furuno to tack the boat. (Push the button, fortunately there are no Siri’s in sailing)
  4. Walk safely to the active sheet.
  5. Release the sheet when the headsail has some quantity of back-winding.   Less for windy days and more for light air days.   When releasing the sheet,  first remove sheet from the stripper and keep 4 wraps on winch until you see the backwinding.   Then, remove wraps briskly while ensuring your hand is clear of the winch and you have a clear running sheet.
  6. Sheet in on the new sheet while the winch has two wraps as the sail is crossing over.
  7. Add two more wraps and put the line through the stripper (shiny metal part) before the sail loads up.
  8. Winch in to the appropriate trim. If you are human, utilize low gear(counter-clockwise) when high gear (clockwise) doesn’t work anymore.
  9. Return to helm and check again that you are on a good course and have no obstructions.
  10. You may want to adjust the traveler to fine tune the Mainsail.

Tacking the other head sails

The three headsails require slightly different techniques.   The auto-tacking jib requires nothing as long as the jib sheet car stopper is placed in the correct location for the new tack.  If so then turn the wheel when it is safe to go.   It would be odd to tack the code zero since it is an off wind sail and you would probably be gybing it. The alternative to gybing it is to furl it, gybe the boat and then unfurl it on the new gybe.

Gybing

The risk during gybing is to gybe too quickly, thus damaging the traveler and/or other gear.

  1. Ensure the course you are gybing to is clear.    Check for other boats and look at the chart to find any other issues.
  2. Center the traveler and make sure both traveler controls are not slack.
  3. Instruct Furuno autopilot to gybe the boat.   There will be a 10 second delay if you have programmed that into your Furuno autopilot.
  4. Make sure to select gybe NOT tack.   The boat will turn much slower for a gybe
  5. Start trimming in the main sheet.    The goal is to have the main near  centerline when the apparent wind angle is greater than 140.   Too early and you are fighting the boat, too late and you will not have time for your next maneuver.
  6. Remove the mainsheet from the stripper and be ready to allow the sail to ease when it gybes.   Watch the leech of the main sail.   IGNORE THE JIB.  It most likely will gybe earlier but do not concern yourself with this sail until much later.
  7. POW!!  Main is over but the movement was not violent because the main started at mid-ships and was eased as it changed sides for a “soft” landing.   Do not ease too far or you will cause a violent impact with the shrouds.
  8. Now clean up the jib by using the technique used for exiting the backwinded jib.   Ease 3 feet on the old active sheet and then trim in on the new sheet.   Repeat until you have proper sail trim.
  9. Adjust trim on main sheet and traveler for optimal sail shape.    Keep an eye out for shrouds chaffing the main.

A long post by me, mostly written as a review for Two Fish but hopefully, a few of our Do’s and Don’ts will help you avoid some of our previous mistakes.


Coming soon…

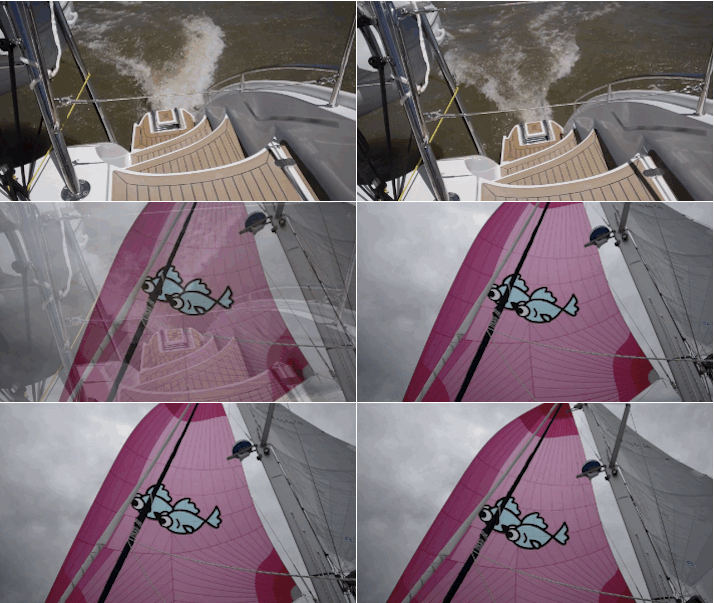
Chute gif

We have some longer posts in the works covering our 2 week Uruguay cruise and tips on sailing the Antares.   In the meantime we thought a few images might provide you with your fix of Two Fish action.

The “movie” is of our spinnaker with our boat logo.   The sail is the size of a NYC two bedroom apartment and takes a bit of skill to put away.


Vacation from a Vacation – A Week in BA

I realize many of our readers have little empathy for the tough life we live.   Our posts probably offer a moment for readers to pause and remember how lucky they are to have conference calls, delayed flights, and the other joys of the working world.  We also realize our lives are rough and decided we needed a bit of a break.  The break came in the form of a week in Buenos Aires.

Where we stayed

Our temporary neighborhood was nicknamed by me “the island where nothing bad ever happens“.   Despite the catchy ring to the name I gave the neighborhood the locals continue to refer to it as Puerto Madero. For New Yorkers it is Battery Park City or for Londoners it is Canary Wharf.   And for residents of Duluth, it is waterfront reclaimed land with many clean new buildings.   The port area also has the advantage of being policed by the Coast Gauard who have a stronger reputation for crime fighting than the traditional BA police.

Close to Puerto Madero is the Retiro area. We went to BASA(located at Basavilvaso 1328) for a great dinner with some friends who are locals. Knowing we are American, they made the reservation for 9:30pm; most locals were showing up when we finished our meal. We recommend it for some hip and tasty food.


We went to a Hash

This is actually a road running event.   No joke.   The casual running club is a global format with the moto of “a drinking club with a running problem”.   The BA club was started by a few Brits 10 years ago and members are both ex-patriots and porteños.  The format of the run differs from a 10k fun run.   The markings for turns are made with flour sprinkled on the sidewalk.  The markings are often cryptic, and as the lead runners see the markings they yell out in spanish AUN AUN.   No clue what this means.  I asked and was told that it was English!   On On!   Spanish lesson failure #1.

Not to be outdone by my first spanish lesson failure I raised the bar.   While riding the train from Buenos Aires to San Fernando, Gail asked what station we had reached.   I helpfully replied “Billeteria”.   Problem is the next 20 stations were labeled as Billeteria, as it means ticket office.   They are sizing the dunce cap for me now.  Gail’s Spanish is much stronger; this will help us later in the month with the Uruguayan Prefectura.
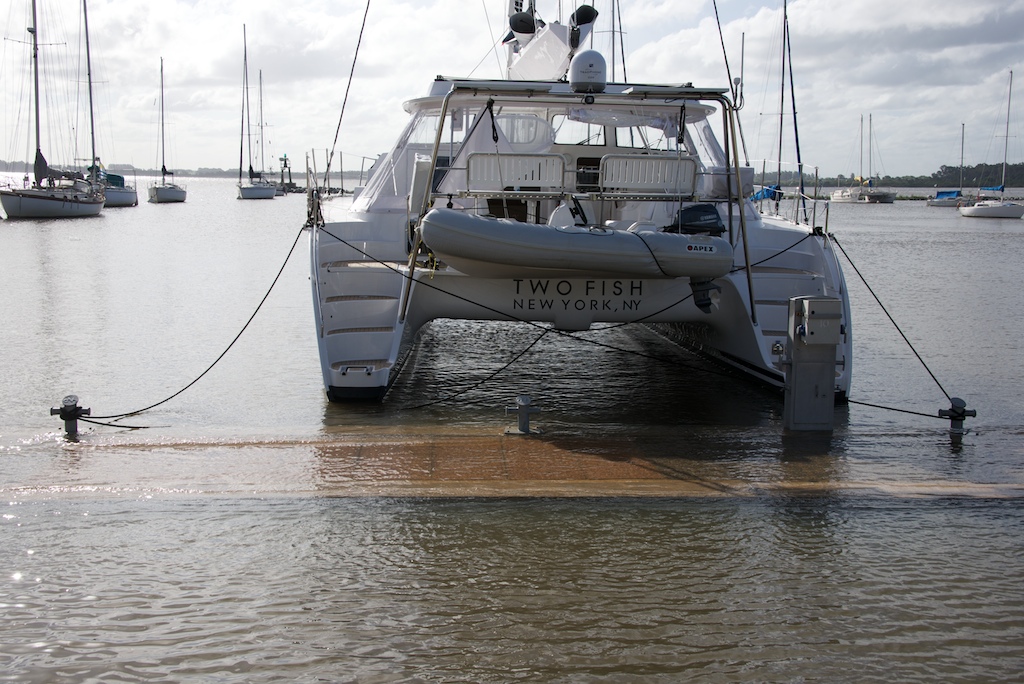
Back to the Hash.   The flour course markings are sometimes drawn incorrectly on purpose.   This causes the “front running bastards” to have to run extra kilometers and allows the group to stay closer together.   As this is a running event they keep the athletes hydrated.  One guy rides a bike full of beer and twice during the 12.5km jog we were offered libations.   Next time bring your own cup.  After the run is over, more beer, empanadas and drinking songs.   Fantastic group, look one up in your town.


 Teatro Colon and  the number 44

44 is the boat’s magic number for many reasons.  The boat is 44 feet long, it is the 44th hull the boat builders have produced and it has something to do with my age.  You can see the dedication to the number 44 on Two Fish’s Facebook page: her birthday is April, 4 1944.    When we were told on our tour that 44 had significance to the Teatro Colon, I had an eerie feeling.  Three architects were needed to complete the famous opera house.   The first two died when they turned 44 years old.  One died by the gun of a lover’s husband and the other of an illness.   A practical solution was found:  hire an older architect.   And so the theatre was completed.  I dismissed this as being a bad omen as things are upside down in the southern hemisphere.    The theatre just received a thorough renovation and is looking very nice.


Traveler Tips – what not to do

We let our inner Californians take over and rented a car.   Never again.  1 hour to fill out the paperwork seemed excessive at first.  But now, having driven here, I realize that the paperwork process should take 2 hours.   Since the chance of an accident is close to 100%, one should be forced to sign every waiver.   And the driver should buy any insurance.  On our way San Fernando we needed to cross the train tracks used by a regular commuter train.  I would estimate the train travels at 35 miles per hour and weighs a humongous amount. The crossing bars for the train crossing on the road were stuck in the down position. So a long line of cars went one by one over the tracks, each hoping that no trains were near. We made it!

We survived unscathed, and upon return the agent almost seemed disappointed to see the car in one piece.  He wondered why we were returning the car early.

Antares Owners Tips

We bought a dive tank in BA as they are tough to ship down.   ( La Casa del Buceador   www.lacasadelbuceador.com)  We bought 1 tank for about $250 just in case we need to clear the props.  They sell other Scuba Pro stuff at  high prices.   Also bought some old-style bar weights. If you have tanks and weights, you may want to try to bring it down.

Last travel tip is to try the commuter train from BA to San Fernando.   It is almost free and full of commerce.  You can buy all-in-one tools, pirated music, food and clothing.  That is a good thing since the trip takes an hour and sometimes offers additional delays.

(My blog posting is delayed –  I am 3 weeks behind so stay tuned for more updates)